

Use a session when you need a browser right now. Use a profile when you want to sign in once and reuse that later.
Browser sessions
- In the app
- With code
Click Browsers → Sessions in the sidebar. The table lists every session in your organization with its ID (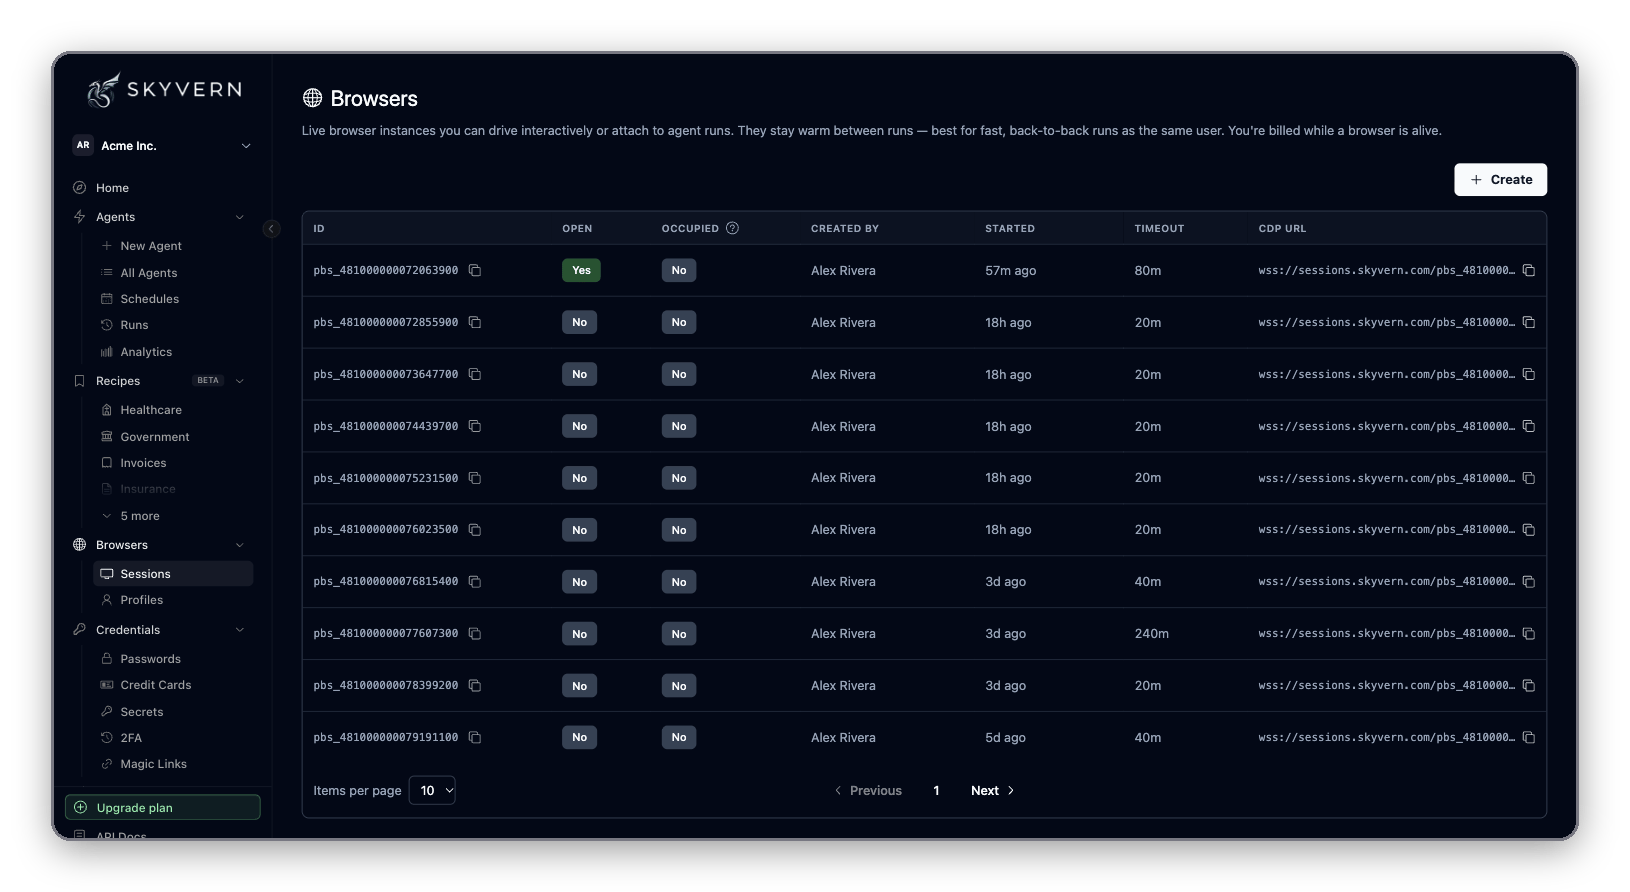
pbs_...), whether it is Open and Occupied by a run, who created it, when it started, its Timeout and its CDP URL.Run an agent in a session
- In the app: on the agent’s run form, open Advanced Settings and paste the
pbs_...ID into Browser Session ID. The agent starts where the browser is: same page, same cookies. - With code: pass
browser_session_idtorun_workflow(Python) orrunWorkflow(TypeScript), as with tasks above.
Watch and take control
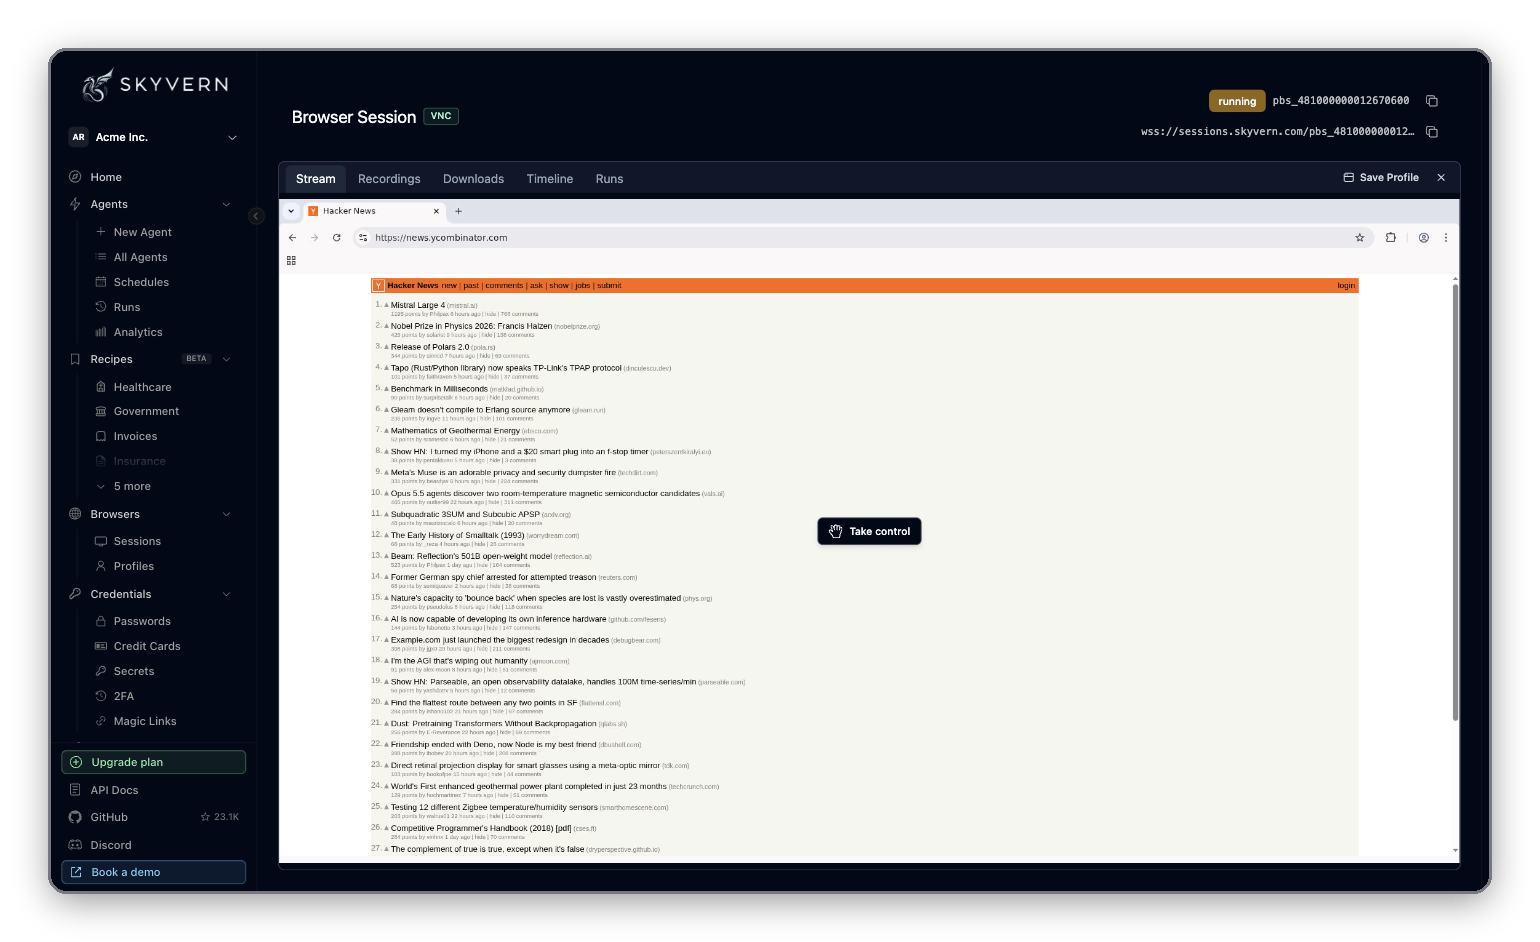
Every session, and every run with a live browser, streams its screen. Click Take control on the stream to use the browser yourself: sign in, dismiss a popup, solve a captcha. Click Stop controlling to hand it back. This is how you put a person in the loop: run a task, pause while someone reviews or acts in the browser, then run the next task in the same session.Browser profiles
A profile is a snapshot of a browser’s state. Start a session or a run from it and the browser opens already signed in.- In the app
- With code
Click Browsers → Profiles. The Browser Profiles page lists profiles with their Source Browser and creation date. Filter with All, User profiles or Auto-managed, or search by name.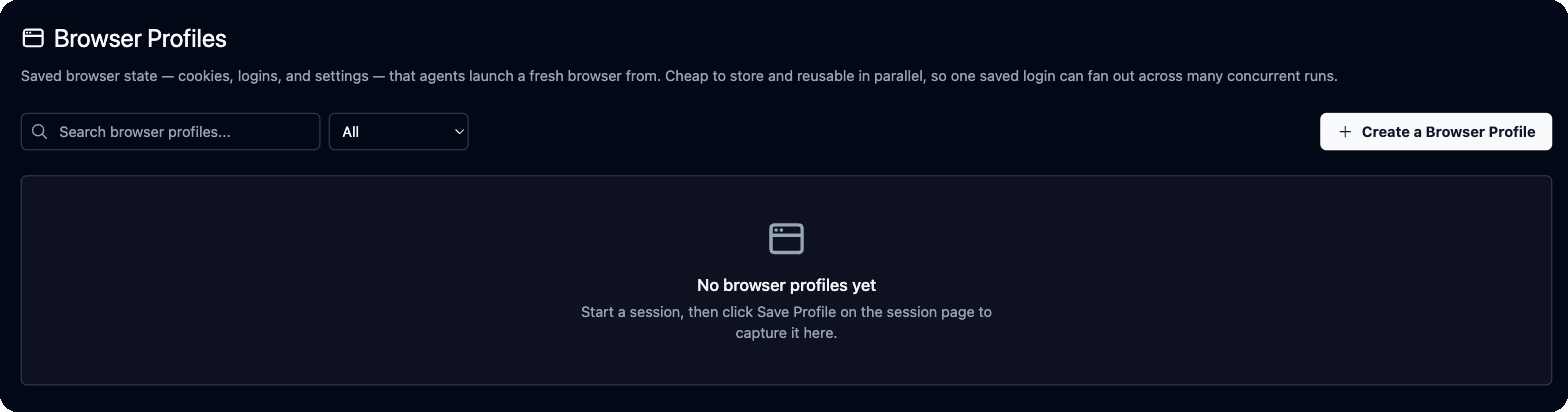
1
Start a capture browser
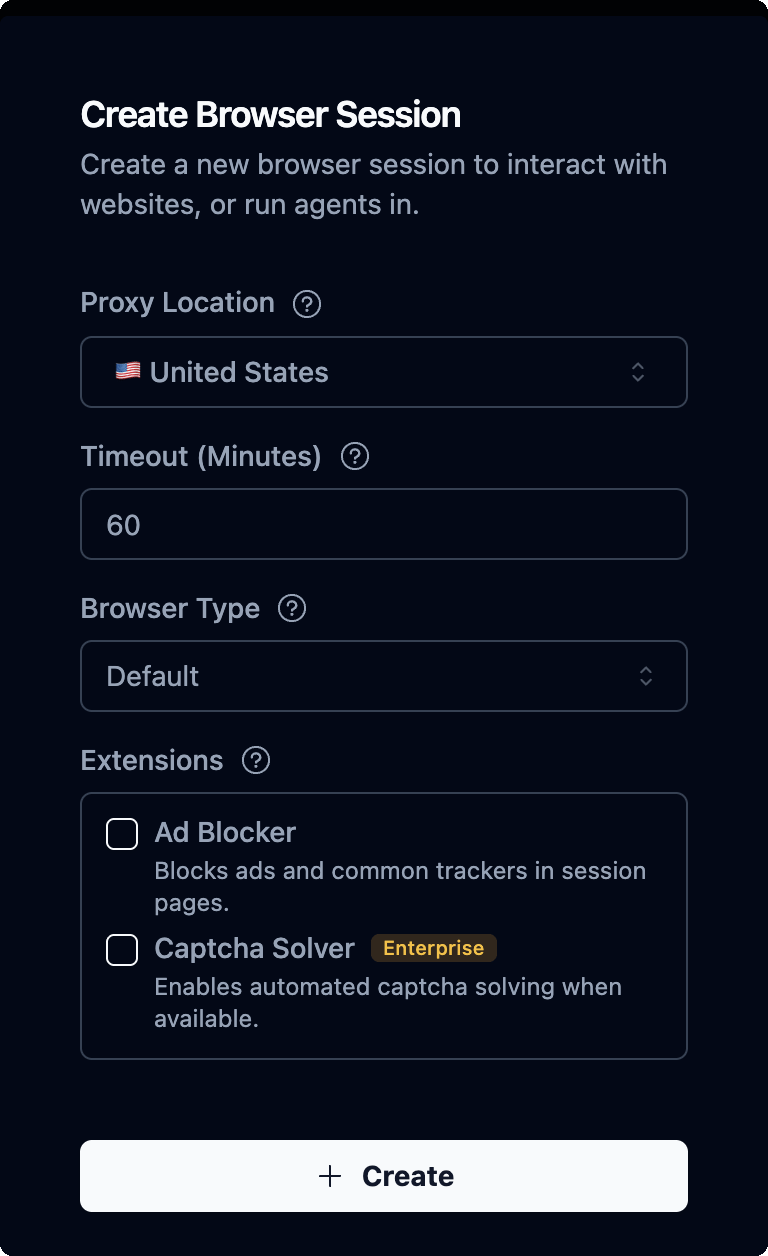
Click Create a Browser Profile. Tick Use a consistent IP address to capture on a stable residential IP, so the site is less likely to challenge the saved login later. Click Create. A live browser session opens.
2
Sign in
Click Take control and sign in to the sites you want saved.
3
Save it
Click Save Profile in the session’s tab bar, enter a Name and an optional Description, and click Save Profile. Saving closes the session and finishes in the background.
vendor-portal-admin, make the right profile easy to find.
Use your own Chrome
Skyvern can drive a Chrome on your machine, with its cookies, sign-ins and extensions. Two options:Let Cloud runs use your Chrome
wss://…/devtools/browser/…) as browser_address, and send your --api-key value as x-api-key in cdp_connect_headers:
--port (default 9222), --chrome-profile-name (copy from a profile other than Default, such as Profile 1), --profile-dir (use a separate Chrome data directory instead), --headless, --chrome-path, and --json (print connection details; can’t be combined with --tunnel). The full list is in the CLI reference.
Share tabs with a local MCP server
The Skyvern Agent extension lets a local MCP server drive tabs in your everyday Chrome. It needs Chrome 138 or later and an MCP server running locally over stdio. Hosted MCP can’t use it yet.- Run
skyvern browser extension-installand follow its steps: inchrome://extensions, turn on Developer mode, click Load unpacked and pick the printed folder. - Start the MCP server with
skyvern run mcp --browser-extension, or setBROWSER_TYPE=extension-connectin its environment. - Run
skyvern browser extension-pairand approve the pairing in the browser, then again in the Skyvern Agent tab that opens. - Drag the tabs you want to share into the Skyvern Controlled tab group, or use Add to Skyvern Controlled in the extension popup.
skyvern browser extension-status. MCP client setup is on MCP and coding agents.
The extension connects to ws://127.0.0.1:19777/extension/v1 on your machine. What listens there depends on the platform:
Next
- Credentials, logins and 2FA: save logins that agents sign in with.
- Browser automation: drive a session with your own Playwright code.
- Runs and schedules: watch runs and their recordings.